Shiny white marks on your molded parts signify internal stress. You must acknowledge that ignoring these visible defects leads to premature part cracking in the field. Consequently, you must identify the causes, address the process settings, and eliminate the defects.
What Is Stress Mark in Injection Molding?
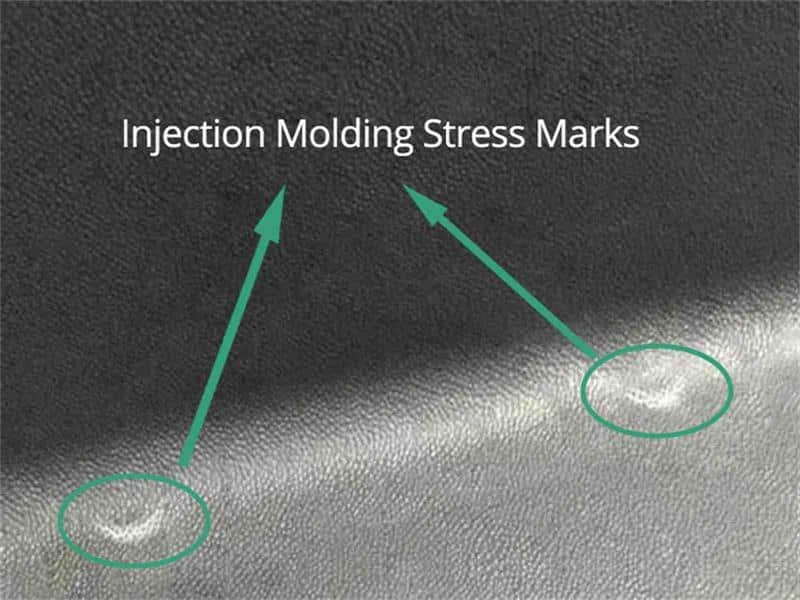
A stress mark is the visible manifestation of energy locked within the molecular structure of a plastic part. You will observe these marks as shiny, whitened, or crazed areas on the plastic surface.
Moreover, you should know that you notice stress marks especially on materials like ABS, PC, and PP because of their mechanical properties. You must examine the part from various angles under a strong light source. In this way, the marks reflect light differently than the surrounding, unstressed material.
Three Dominant Types of Stress Marks
Production issues typically feature three types of stress marks. You must learn to distinguish among them.
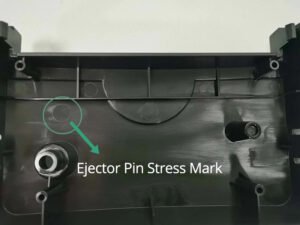
Ejector Pin Stress Marks
These defects appear precisely where the ejector pins contact the part’s surface. Specifically, they form when the part is ejected before it has cooled sufficiently. It means that the hot material deforms under the localized pressure of the pin.

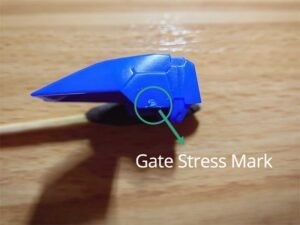
Gate Stress Marks
You find these irregular white patterns near the injection point. Clearly, they result from high pressure forcing the melt through a restricted area.

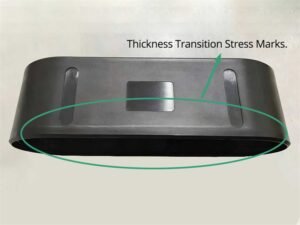
Thickness Transition Stress Marks
You see these marks where wall sections change dimension abruptly. Ultimately, differential cooling and shrinkage rates between the thin and thick sections induce localized internal tension.

The Mechanism of Internal Stress
Internal stress is the invisible force creating these visible defects. Molecular chains freeze in oriented, non-relaxed positions during the cooling phase.
Therefore, this rapid, constrained freezing locks the chains into unbalanced conformations that store potential energy. When an external or internal force releases this stored energy, the parts crack.
How Does Stress Mark Formation
The formation of stress marks stems from a multi-factor combination of flow dynamics, thermal gradients, and material properties. Understanding these sources allows you to formulate targeted solutions.
Orientation and Shear Stress Dynamics
Orientation stress develops from molecular alignment during the melt flow. The high viscosity melt near the mold walls flows more slowly than the core material.
Consequently, the shear stress aligns the polymer chains along the direction of flow. Rapid cooling then freezes this unnatural orientation before the chains have time to relax into a random, low-energy state.
Thermal and Shrinkage Stress
Cooling stress arises from unequal shrinkage rates. Thick sections require significantly longer to cool than thin sections. For instance, the surface layers solidify first, but the core material remains molten longer.
This differential cooling creates a surface layer in tension and an internal core in compression. This unbalanced state often leads to stress marks at corners and transitions.
Pressure Distribution and Packing Effects
Pressure distribution during the packing stage greatly influences residual stress. High holding pressure forces more material into the cavity. As a result, you tightly pack the molecular chains under extreme pressure.
Once the gate freezes, the pressure quickly drops, and you freeze the chains in a highly stressed state. Hence, areas near the gate often exhibit the most severe stress marks because the material experiences the highest pressure there.
Material Properties that Amplify Stress
Polymers develop stress marks more easily based on their molecular structure. For example, rigid chains with benzene rings have poor mobility and resist stress relaxation. Polar chains create strong attractive forces that prevent molecular movement and lock in residual stress. Large side groups, such as phenyl groups in polystyrene, physically block chain movement and cause internal stress to build up during processing.
How to Fix Injection Molding Stress Marks
You must implement a systematic strategy across process parameters, mold design, and material selection. The purpose is to eliminate stress marks effectively. You should begin with the least expensive changes and progress toward mold modifications.
Process Parameter Adjustments
You can quickly address stress marks by fine-tuning your machine settings.
Reduce Excessive Holding Pressure
You must reduce holding pressure until the stress marks disappear. First, cut the pressure in half. If the stress marks vanish but you notice sink marks, you have isolated the problem. You must then incrementally increase the holding pressure. Until the stress marks just begin to appear, and then back off by approximately ten percent.
Minimize Holding Time
You must shorten the hold time to the minimum duration needed to seal the gate. In addition, you should monitor the part weight shot-to-shot. When the weight remains stable, your holding time is sufficient. Holding the material longer than the time required for the gate to seal provides no benefit; you simply freeze more oriented structures.
Increase Temperatures for Relaxation
Process parameters directly affect stress mark formation. Raise the barrel temperature to lower melt viscosity and reduce molecular orientation during flow. Increase the mold temperature to slow cooling and allow molecular chains to relax. This is especially important for thick-walled parts. Use multi-stage injection by filling 90% of the cavity quickly, then decelerating gradually for the final 10% to avoid both excessive shear stress from fast injection and melt stratification from slow injection.
Design and Tooling Modifications
Permanent solutions often involve changing the mold tool or part geometry.
Mitigate Sharp Corners
Sharp corners function as stress risers, concentrating stress. To clarify, you must ensure the internal fillet radius exceeds 70% of the thinner adjacent wall thickness. You will match the external radius to the part geometry requirements.
Ensure Uniform Wall Thickness
Uneven wall thickness guarantees differential cooling and shrinkage. In effect, you create stress at the transitions. You must design for uniform wall thickness whenever possible. Moreover, if thickness variation is essential, you must transition gradually over an extended distance.
Optimize Gate Location and Design
Placing the gate at the thin wall section requires high injection pressure, which increases shear stress. On the contrary, you should relocate the gate to the thickest wall section when possible. Similarly, you must utilize a fan gate instead of an edge gate; a fan gate distributes stress over a wider area.
Improve Cooling System Uniformity
You prevent differential shrinkage stress by ensuring uniform cooling. Specifically, cooling channels must maintain a consistent distance from the part surfaces. You should add conformal cooling channels near areas that show consistent stress marks.
Advanced Strategies and Post-Processing
You can use material selection and heat treatment when process and design changes are not enough.
Material Selection and Modification
High molecular weight resins resist stress cracking better because the larger molecules create stronger entanglement. Furthermore, blending modifiers can reduce stress sensitivity. For example, you can add PE to PC to create stress-dispersing phase boundaries.
Post Molding Heat Treatment
Heat treatment is a final, reliable method to relax frozen-in stress. Accordingly, you must hold parts at a temperature 10 to 20 degrees above the service temperature for a calculated duration. You must ensure slow, natural cooling after treatment, as forced cooling will reintroduce stress. Otherwise, you risk warping the part if the treatment temperature is too high.
Testing and Quality Control for Stress Detection
You should use testing methods to verify the effectiveness of your corrective actions and ensure quality.
Solvent Immersion Test
You must immerse the part in a solvent, like acetic acid for PC, for a short duration. The solvent will cause crazing or cracking at high-stress locations first. Consequently, you can determine the severity and location of the residual stress.
Polarized Light Testing
For transparent parts, you view the part between crossed polarizers. Thereupon, colored stress patterns emerge, indicating the magnitude and direction of the stress.
Conclusion
Stress marks indicate frozen molecular orientation and uneven cooling. Reduce holding pressure and time first. Increase mold and melt temperatures second. Fix the part design third. Use heat treatment as a final option for crucial applications.


